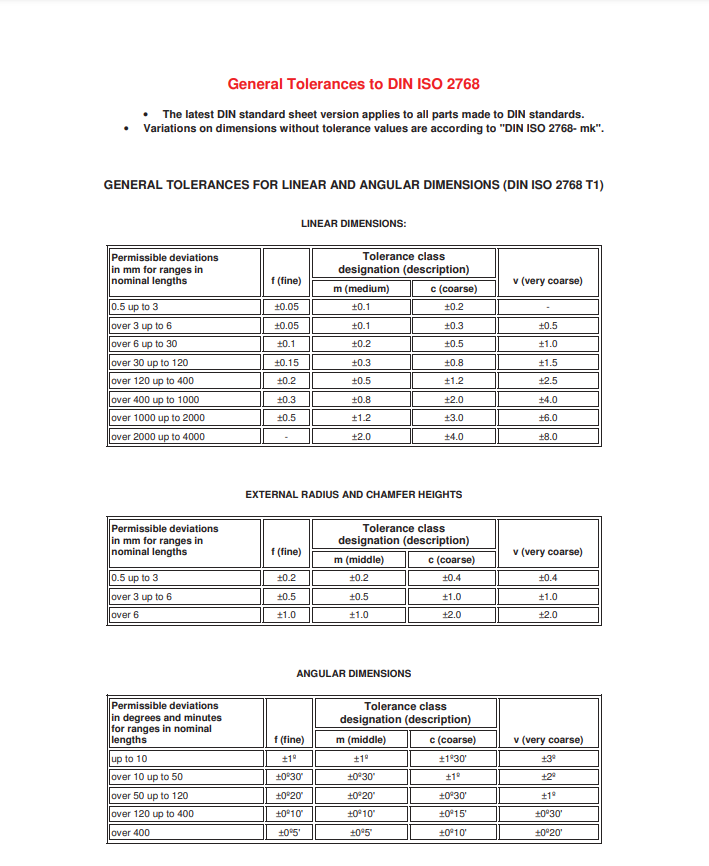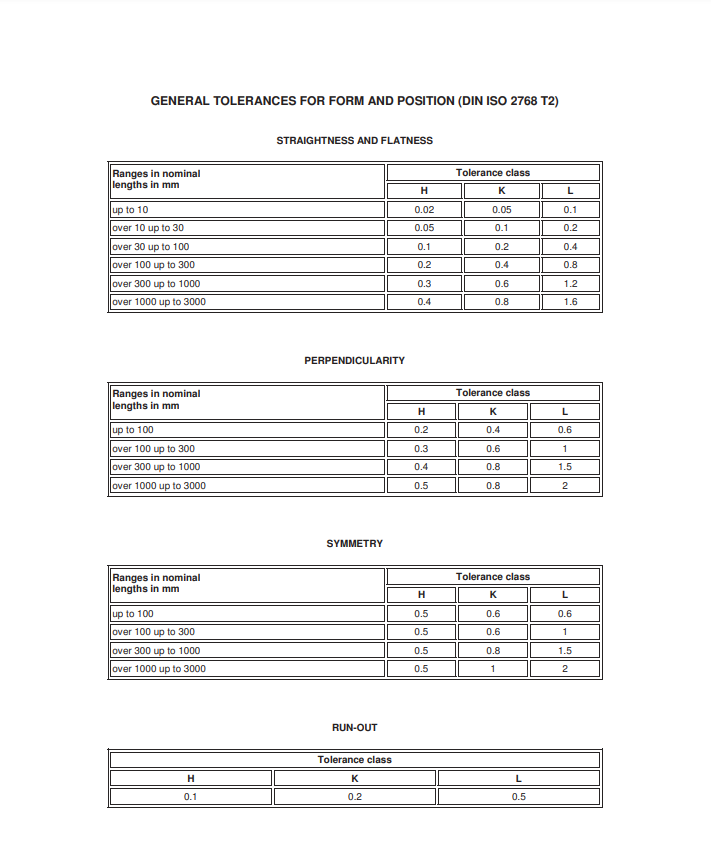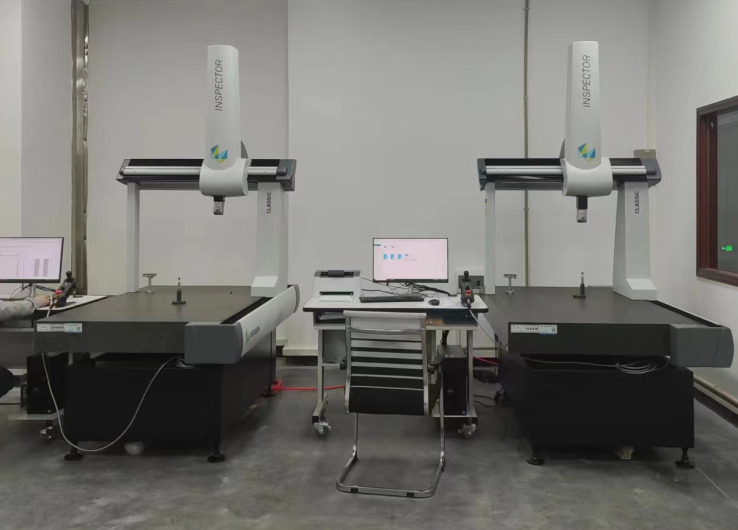
Tolerance is a critical aspect of machined parts that refers to the acceptable deviation from the desired dimension or specification. Tolerance determines how much variation is permissible in the part’s dimensions and ensures that the part meets the required specifications. Machined parts must meet certain tolerances to ensure that they function correctly, fit together properly with other components, and can interact precisely within their intended system.
The tolerance for machined parts varies depending on the part’s application, material, and manufacturing process. In industries like aerospace, automotive, and medical devices, machined parts may require very high tolerances to ensure precision and safety. In general, the standard tolerance limit is set around +/- 0.005″ (0.127 mm) for CNC machining according to many industry sources I can find, while for specialized applications, very tight tolerances as low as +/- 0.0001″ (0.00254 mm) can be achieved.

In addition to dimensional tolerances, other types of tolerances may also be specified based on factors such as surface treatments, roundness, angularity or concentricity. The specific tolerances required for a machined part will depend on the intended application and the part’s functional requirements.
It is essential to ensure that the tolerance requirements are accurately communicated between the customer and the manufacturer. This would help guarantee that the machined part meets the desired specifications and performs as intended. Ultimately, it is critical to maintain a balance between achieving the desired level of precision and the associated costs of producing parts with tighter tolerances.
